Part study, part sandbox — from
academic projects in computer science to
weekend experiments involving wires, code, and
occasional smoke...
Recent Updates
Improved Smart Mirror Build
July 19, 2025
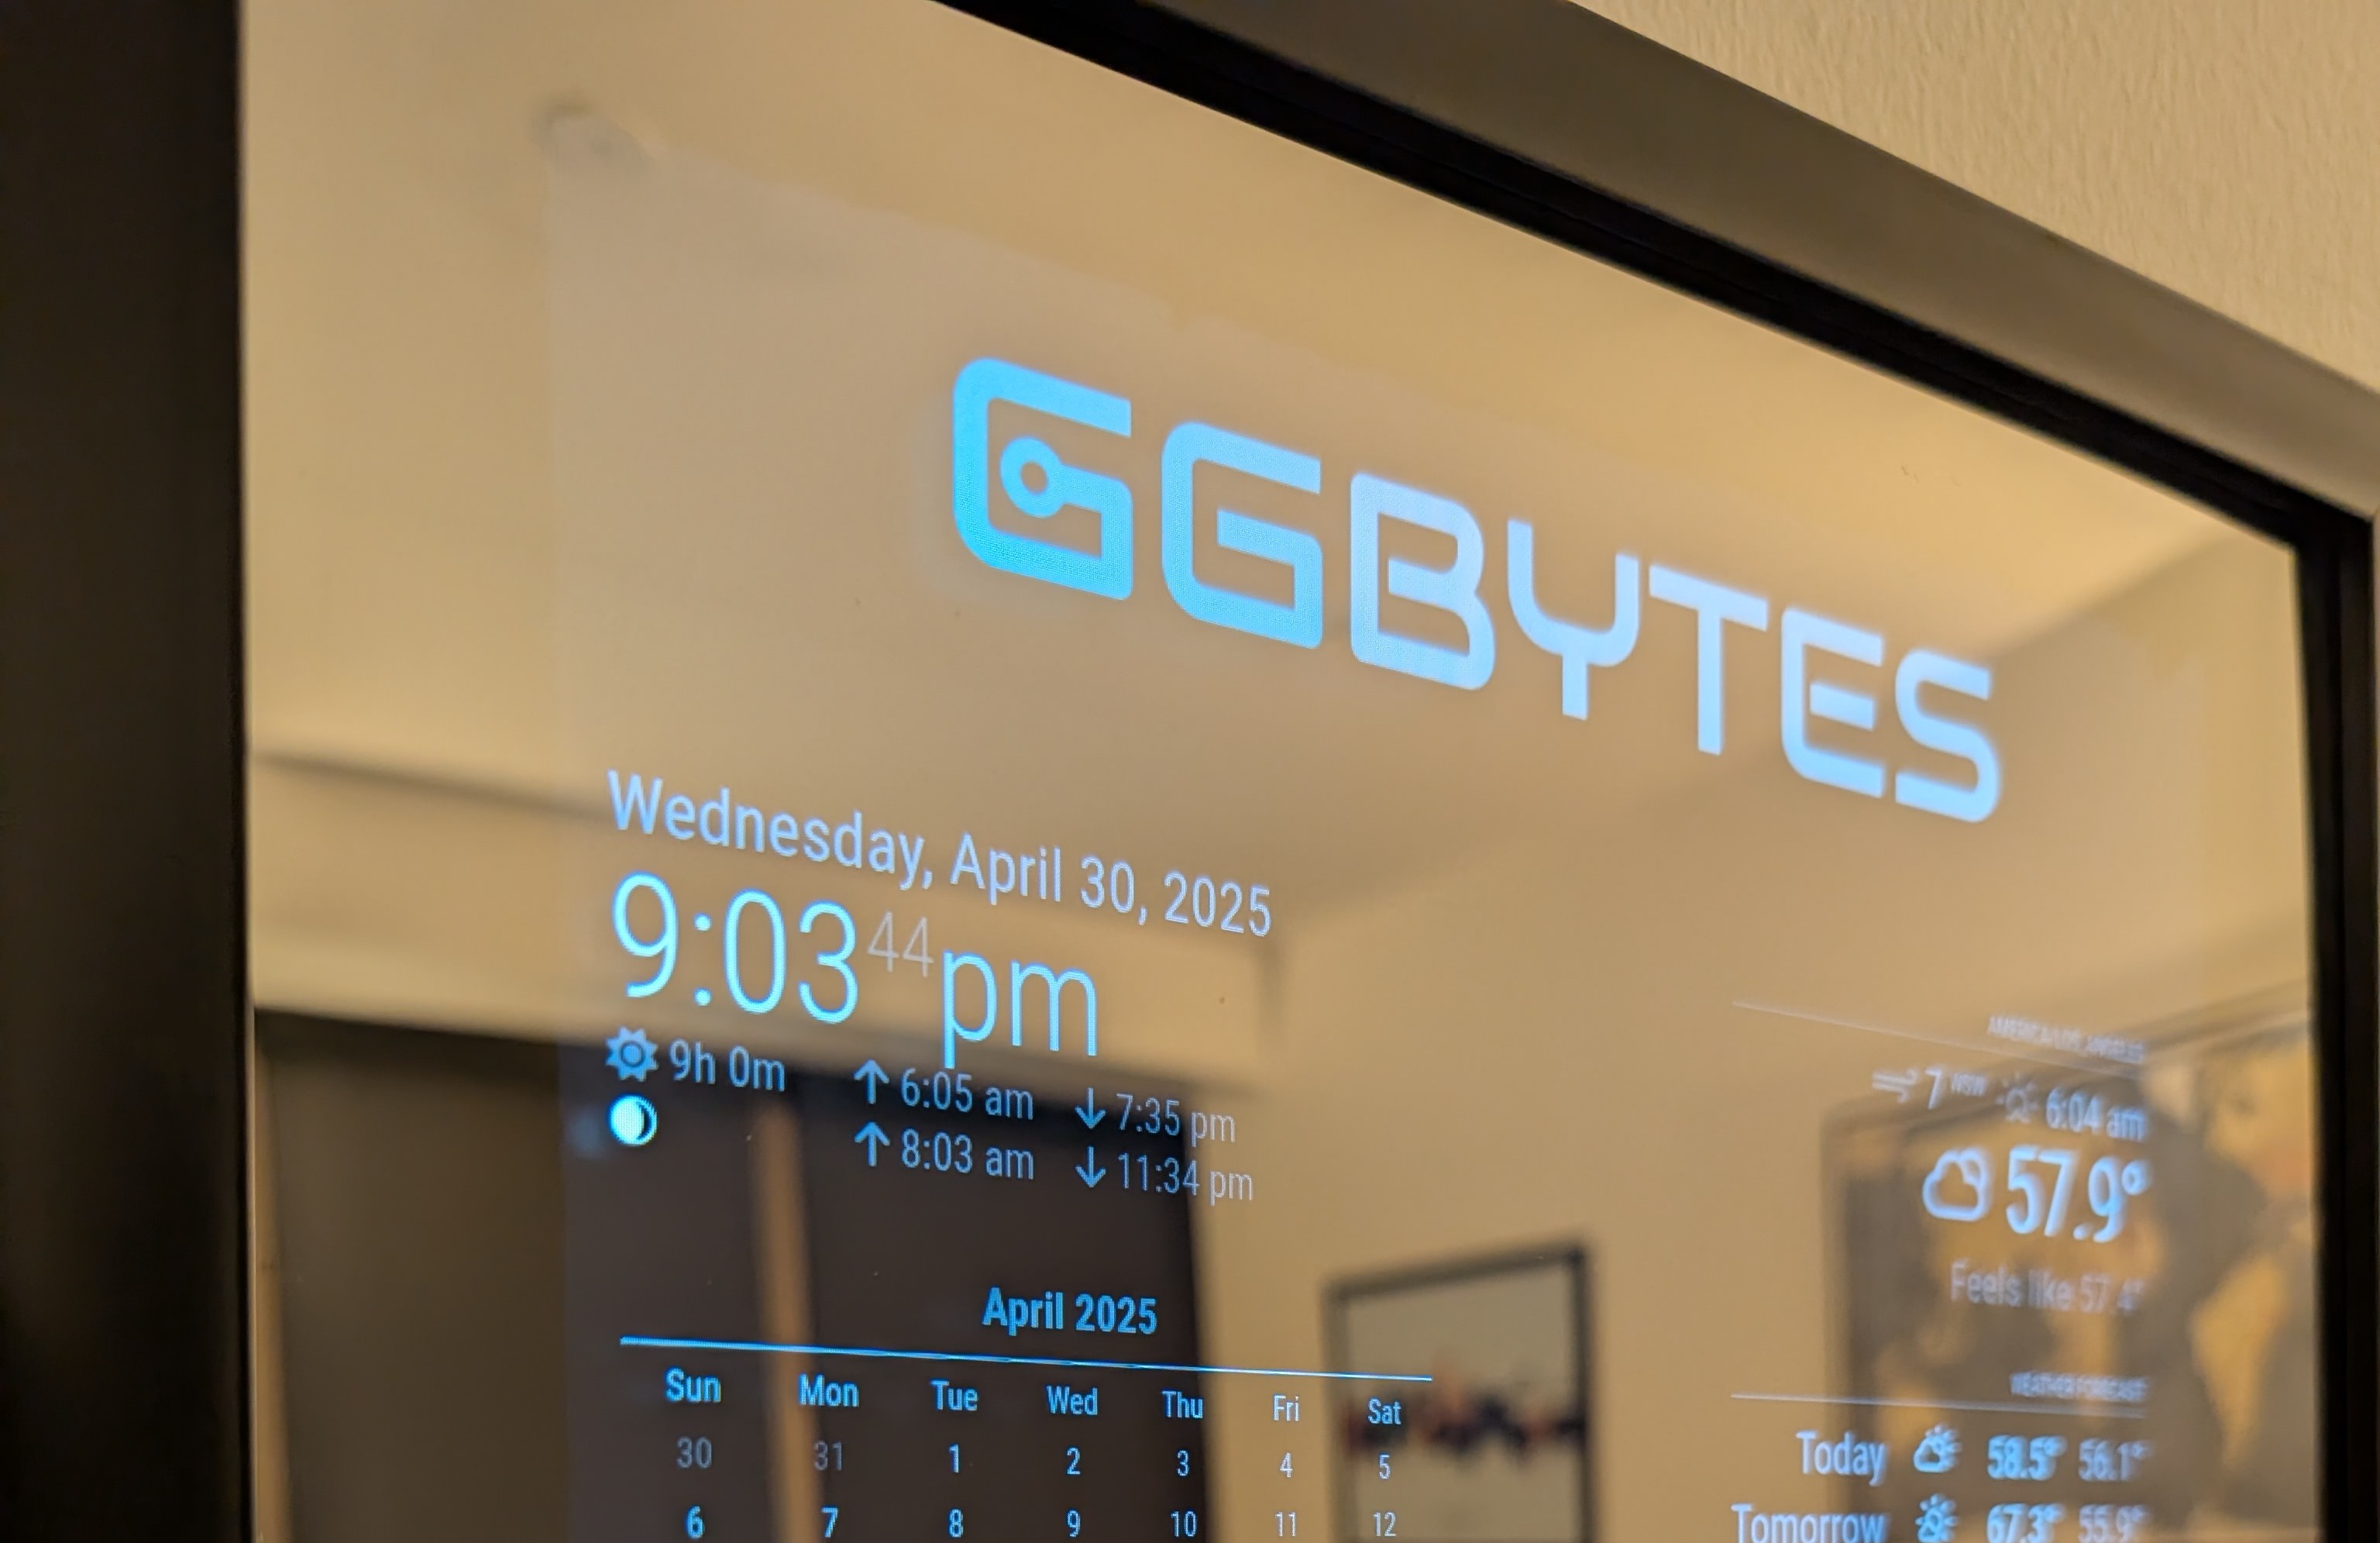
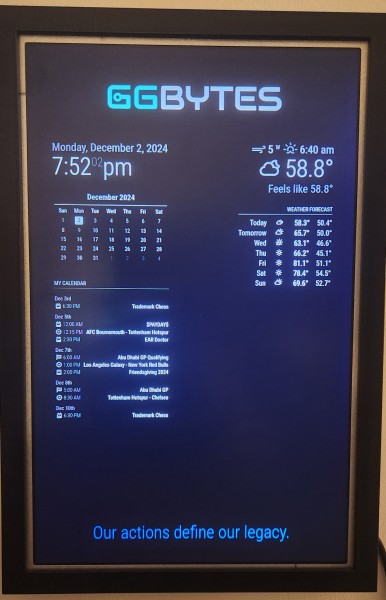
I recently built a smart mirror using a Raspberry Pi 4 and a two-way mirror. The project is uses MagicMirror² software, which provides a customizable interface for displaying information like time, weather, news.
Components
MagicMirror² Modules
Core Modules
Third-Party Modules
Steps to Build
- Install MagicMirror²: Follow the installation guide to set up the software on your Raspberry Pi.
- Configure Modules: Customize the modules you want to display, such as weather, calendar, and news. You can find a list of available modules here.
- Set Up the Hardware: Assemble the two-way mirror with the monitor and frame. Ensure the monitor is positioned behind the mirror for optimal visibility.
- Connect the Raspberry Pi: Connect the Raspberry Pi to the monitor and power it on. Make sure it boots into the MagicMirror² interface.
- Final Adjustments: Adjust the settings in the
config.js file to customize the appearance and functionality of your smart mirror.
The insides
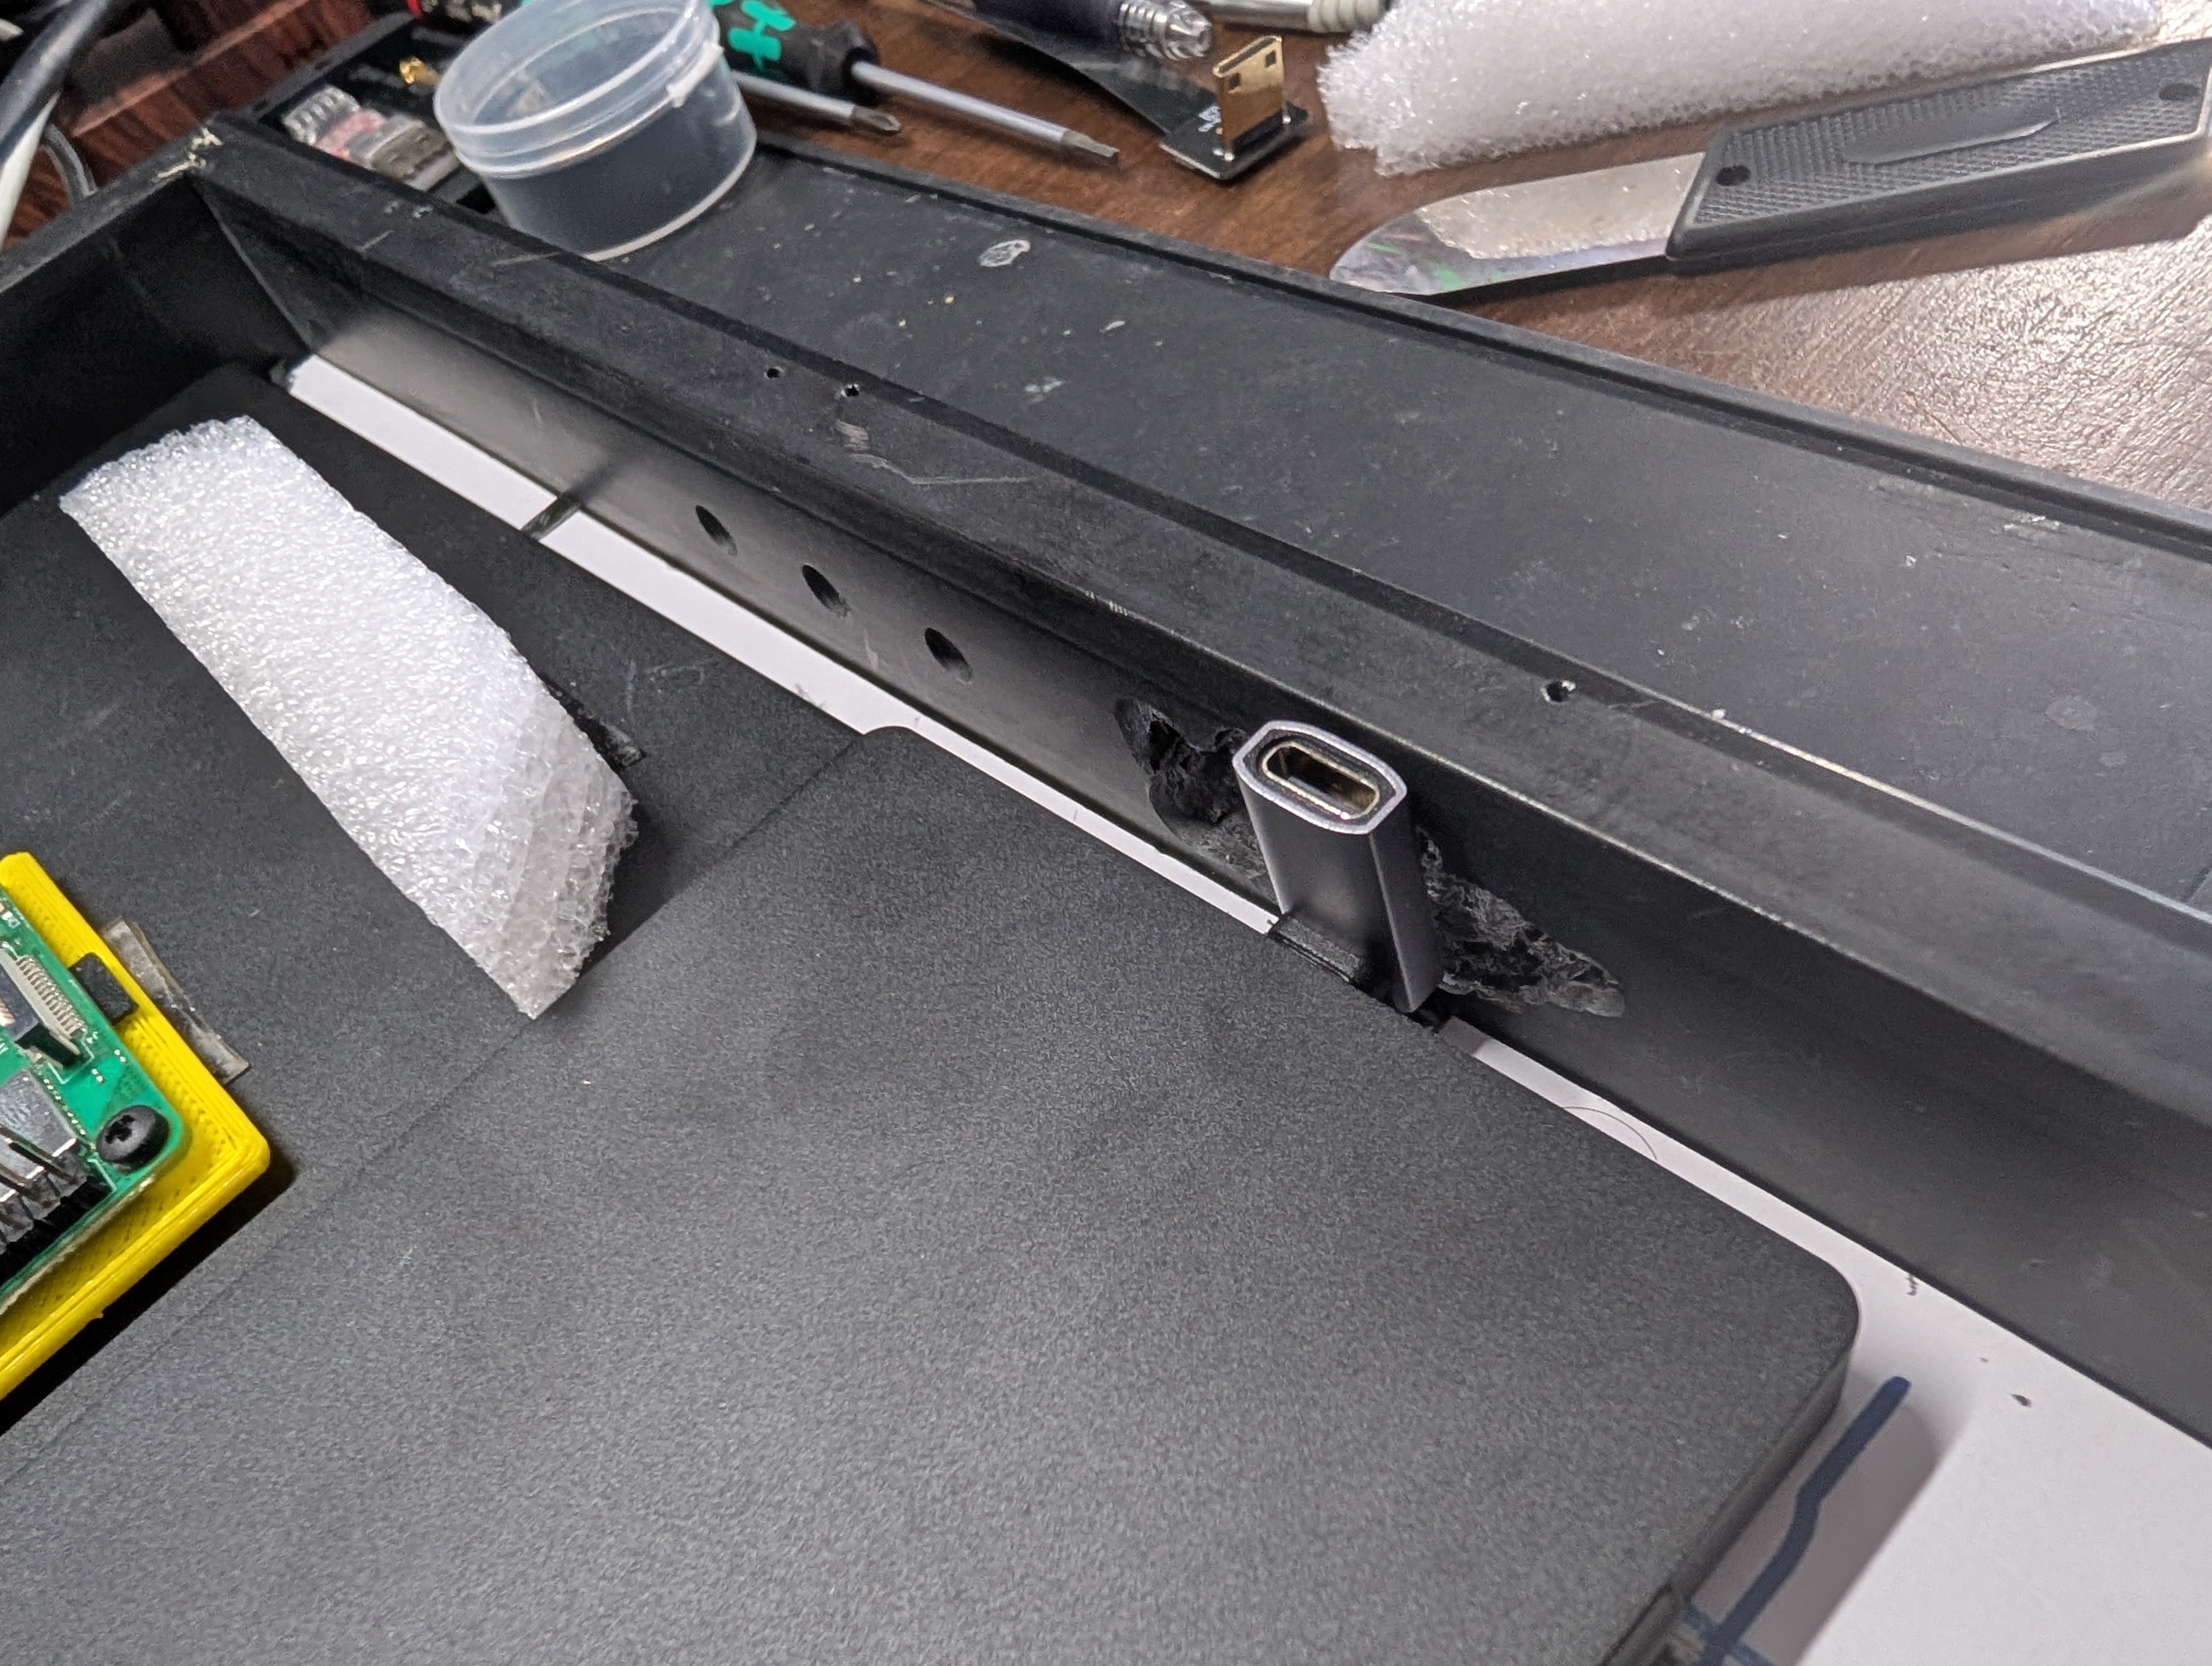
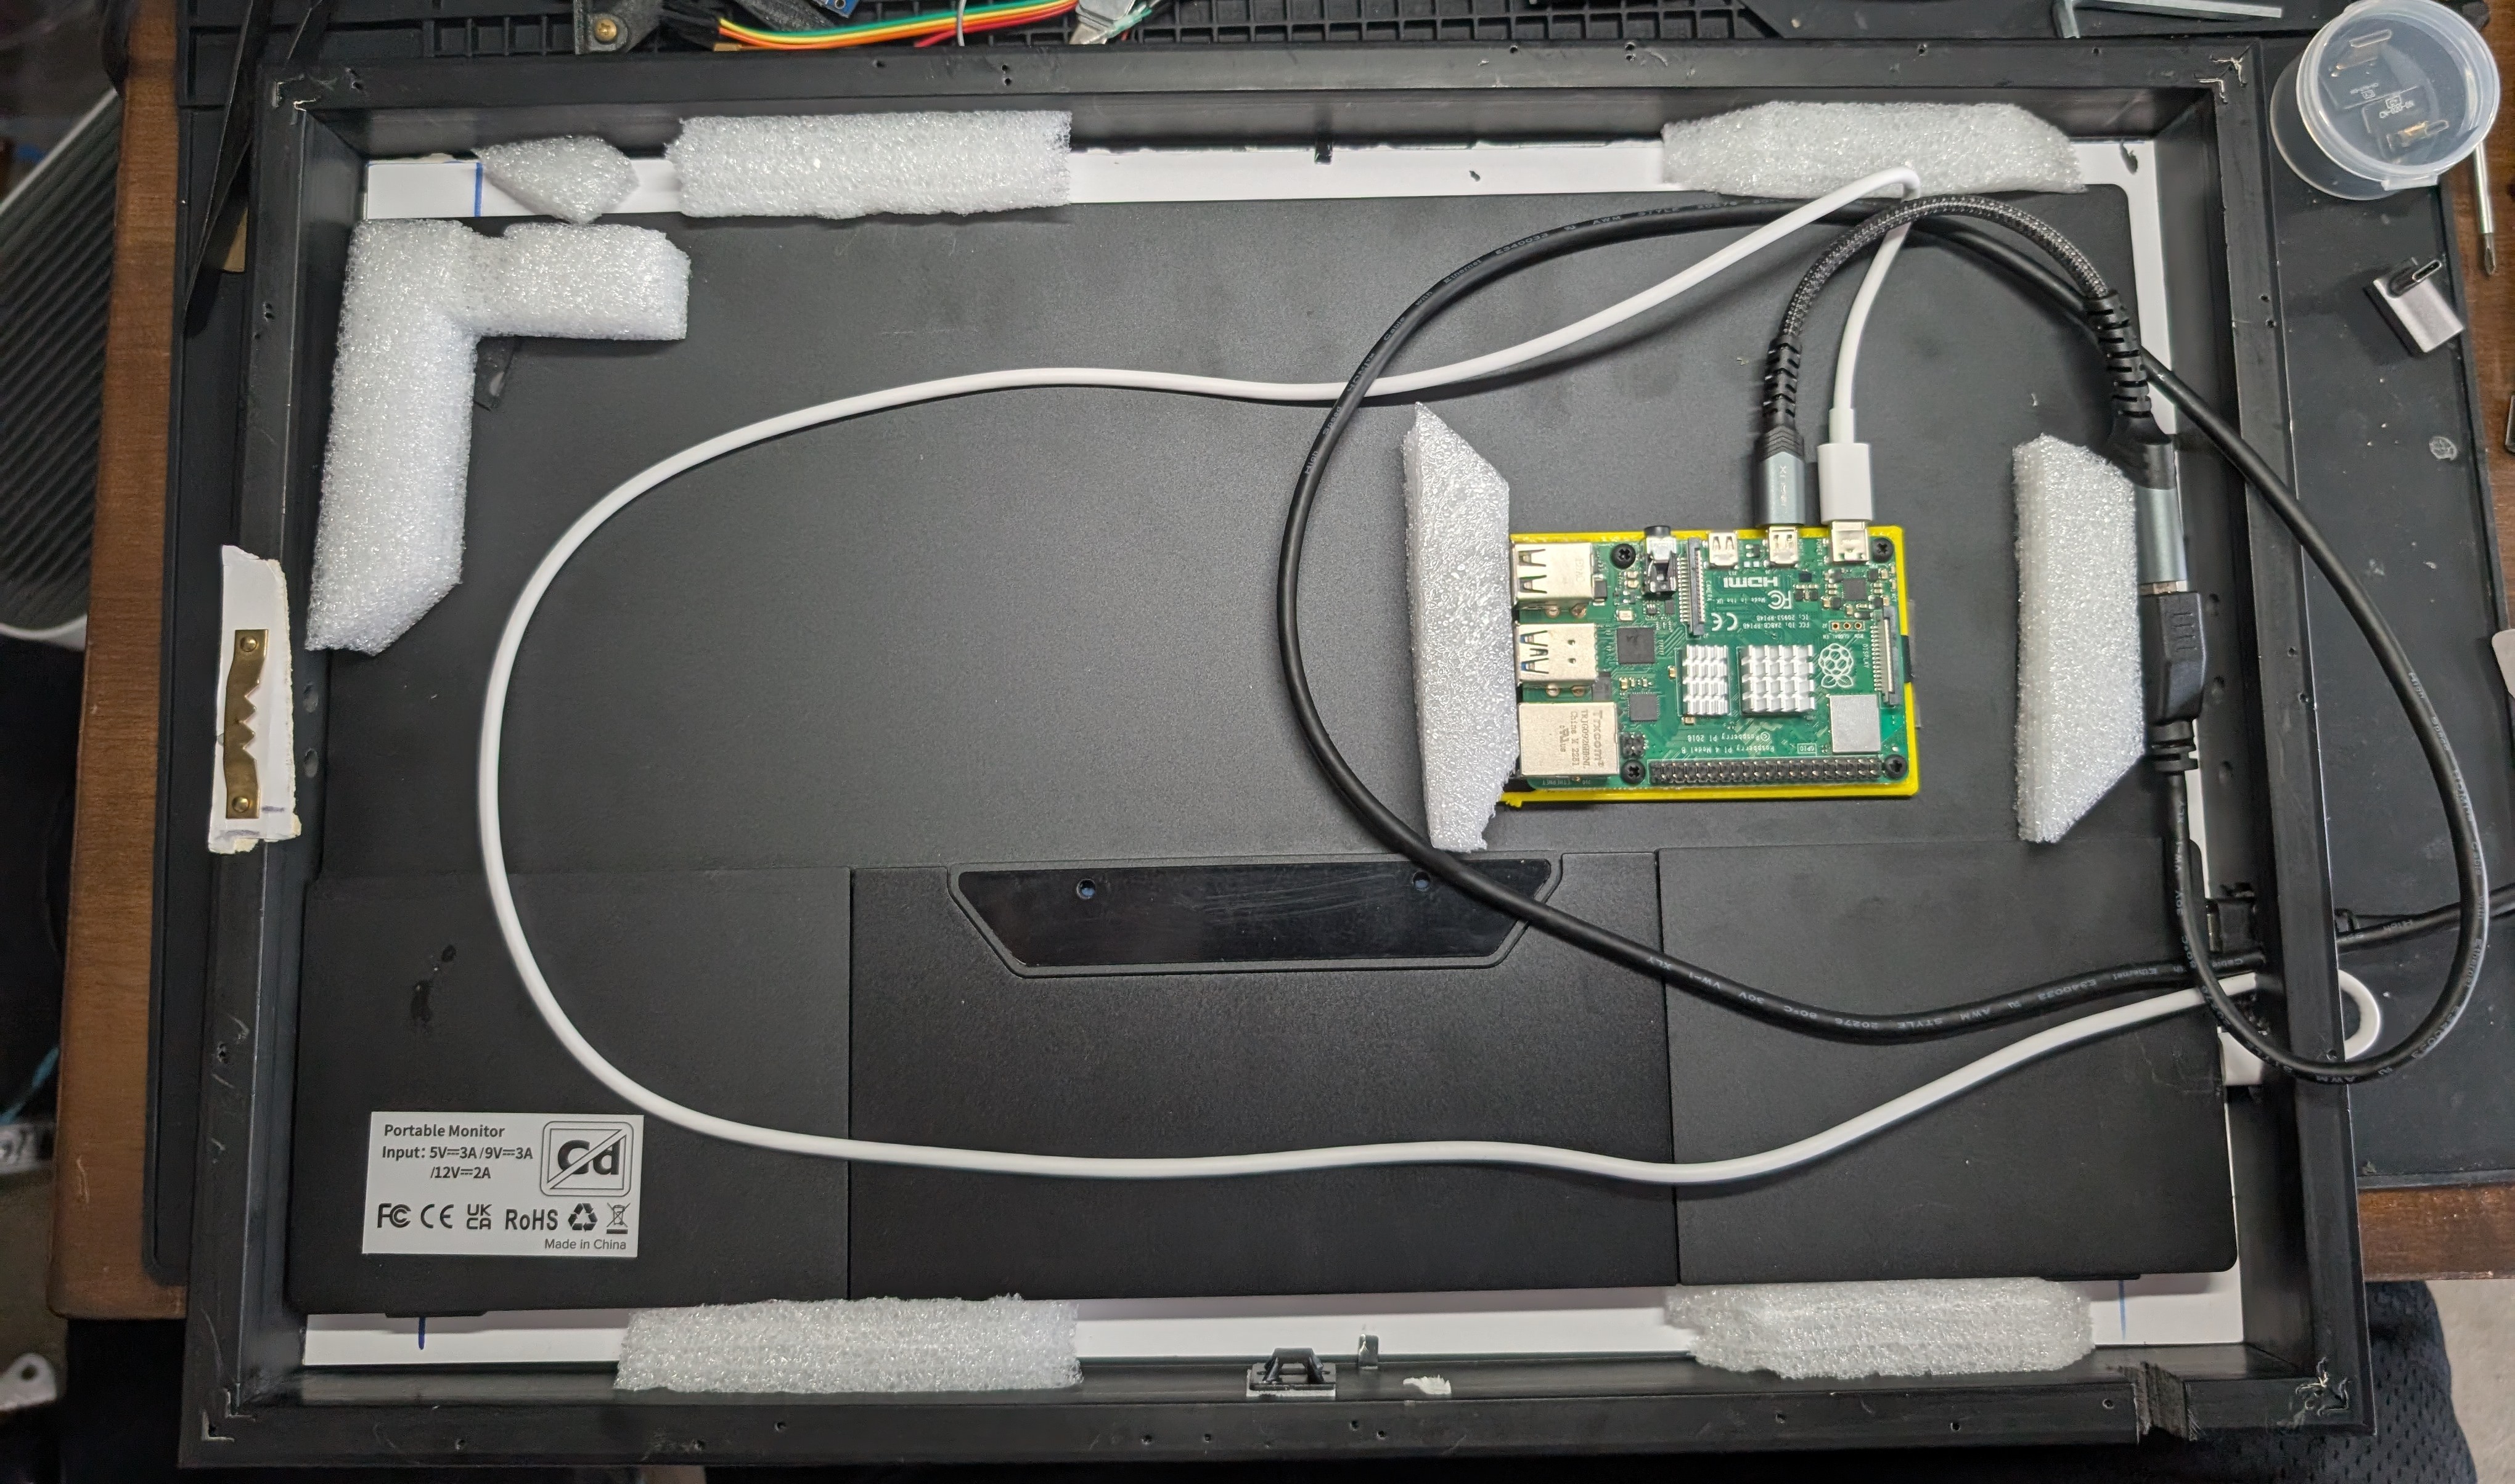
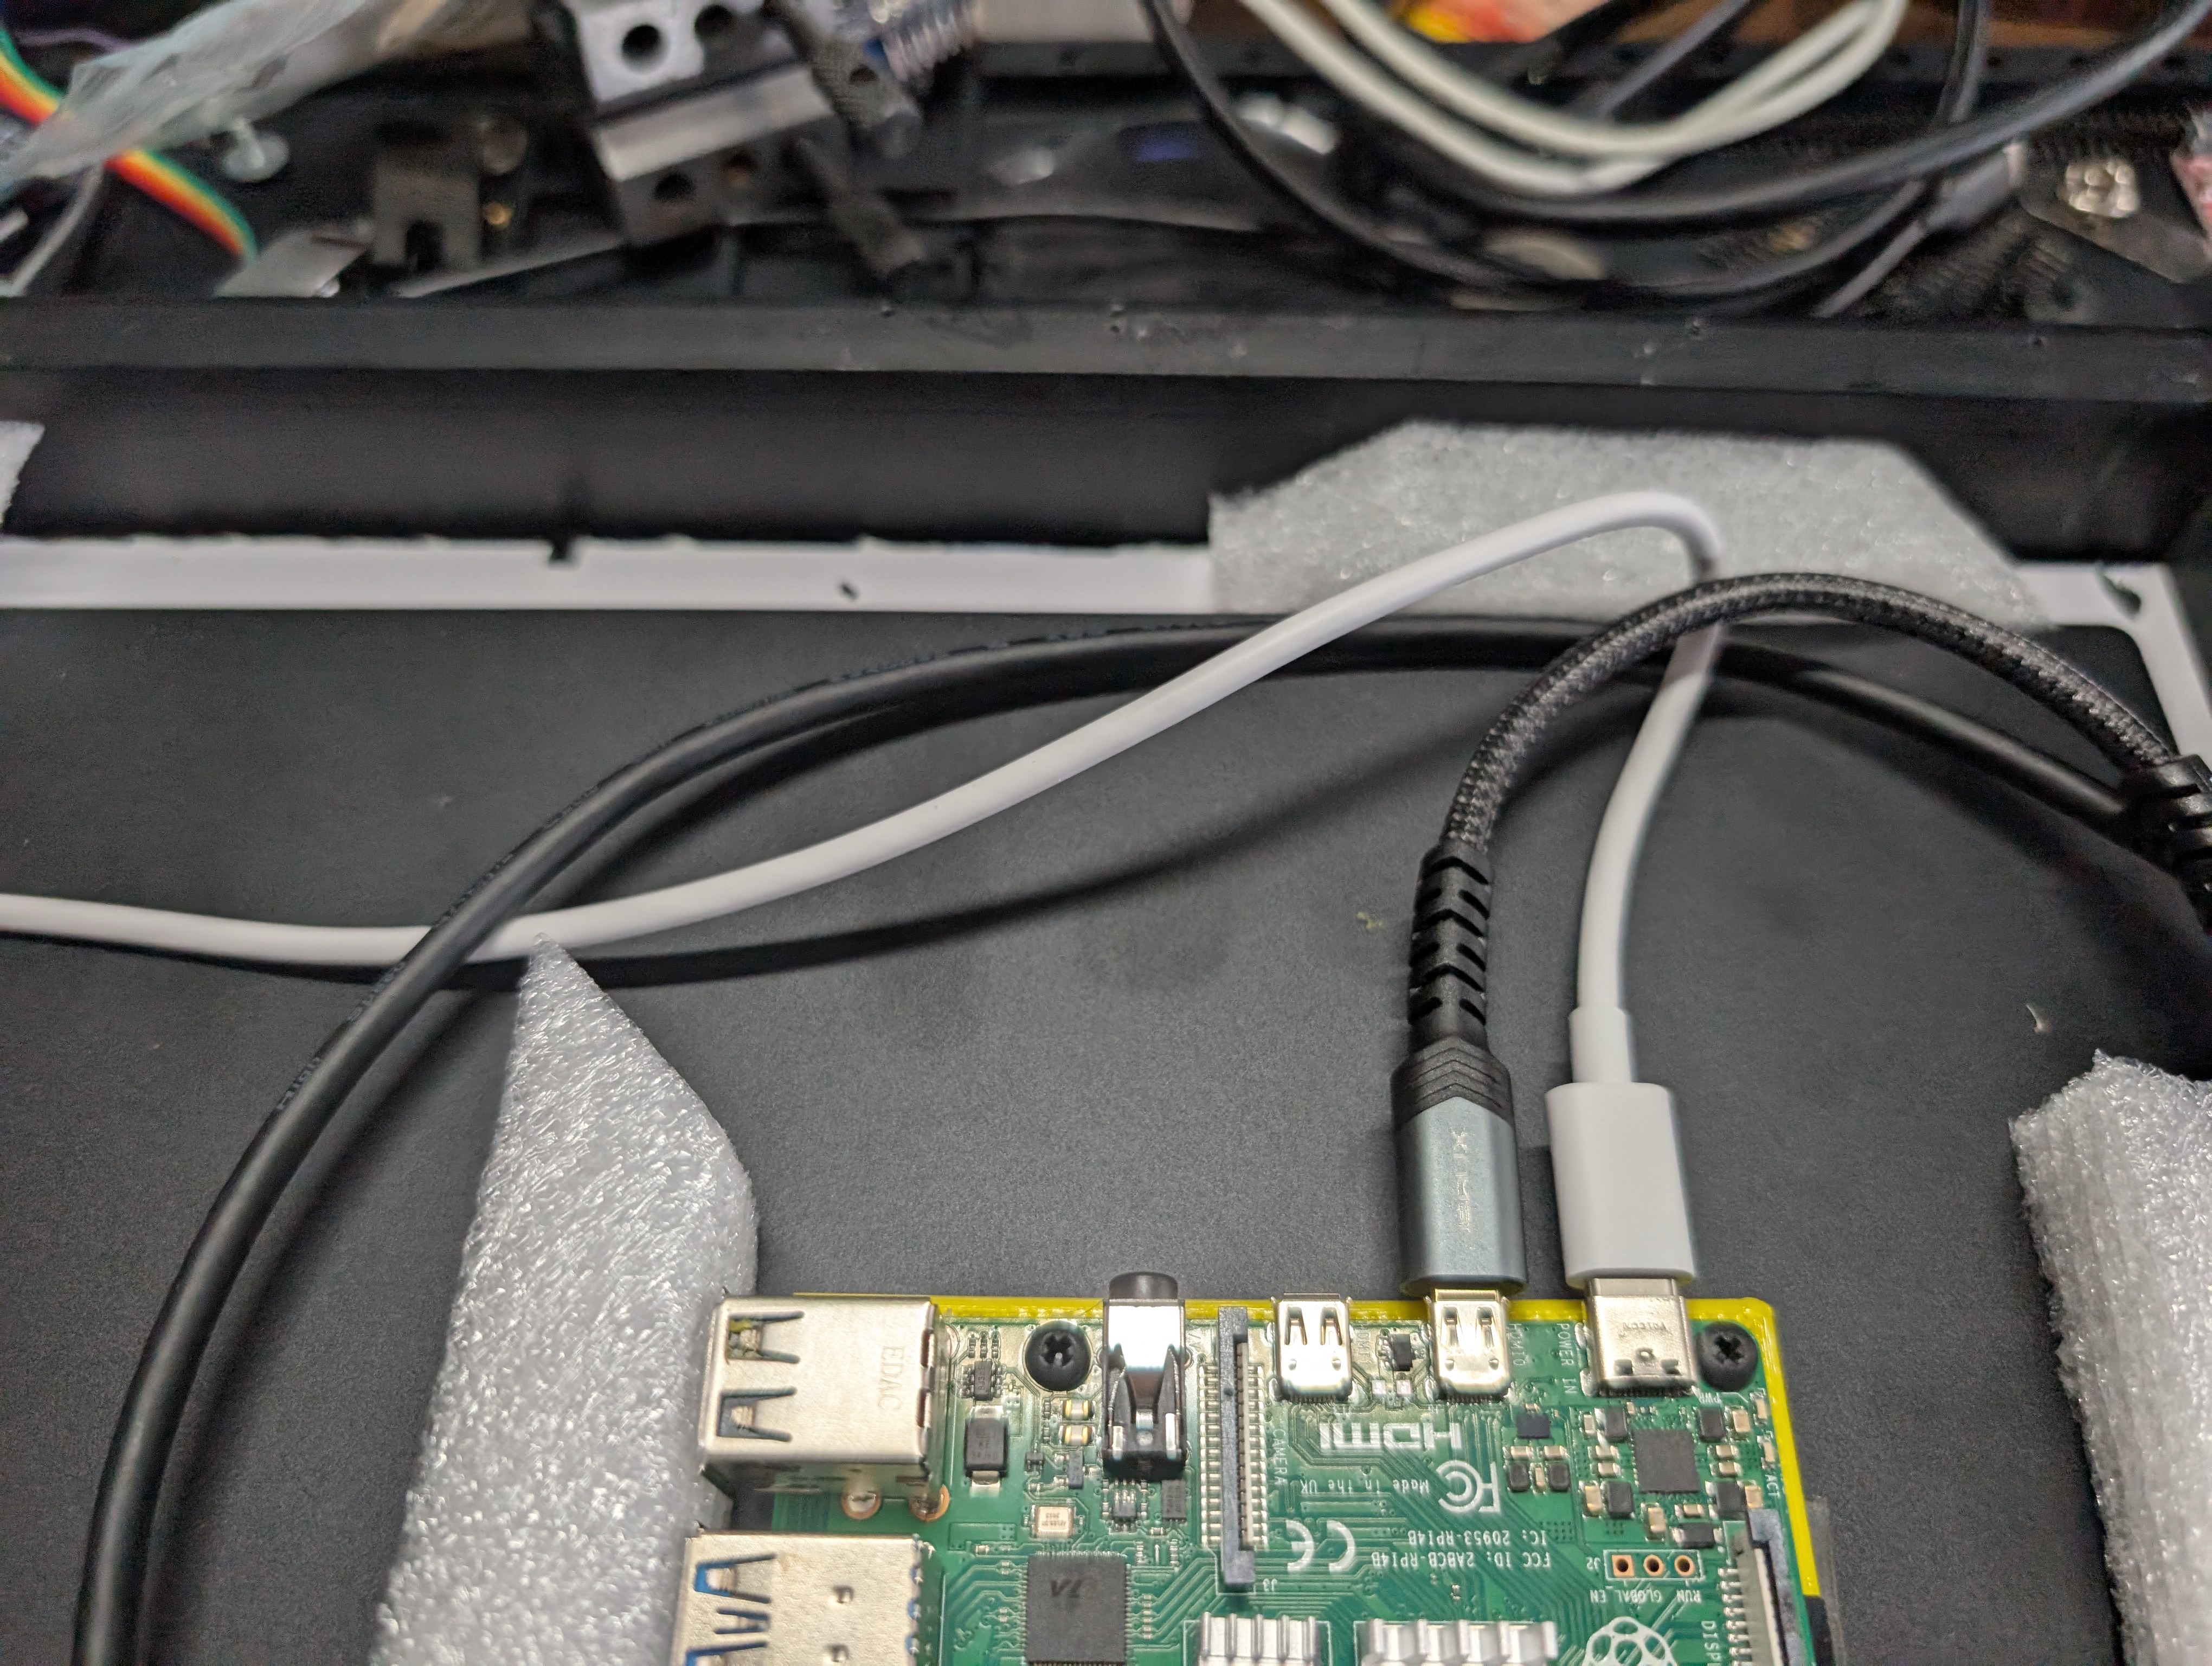
Soo... was hoping to use these right angle usb connectors to keep all the cables inside but that didn't go as planned.
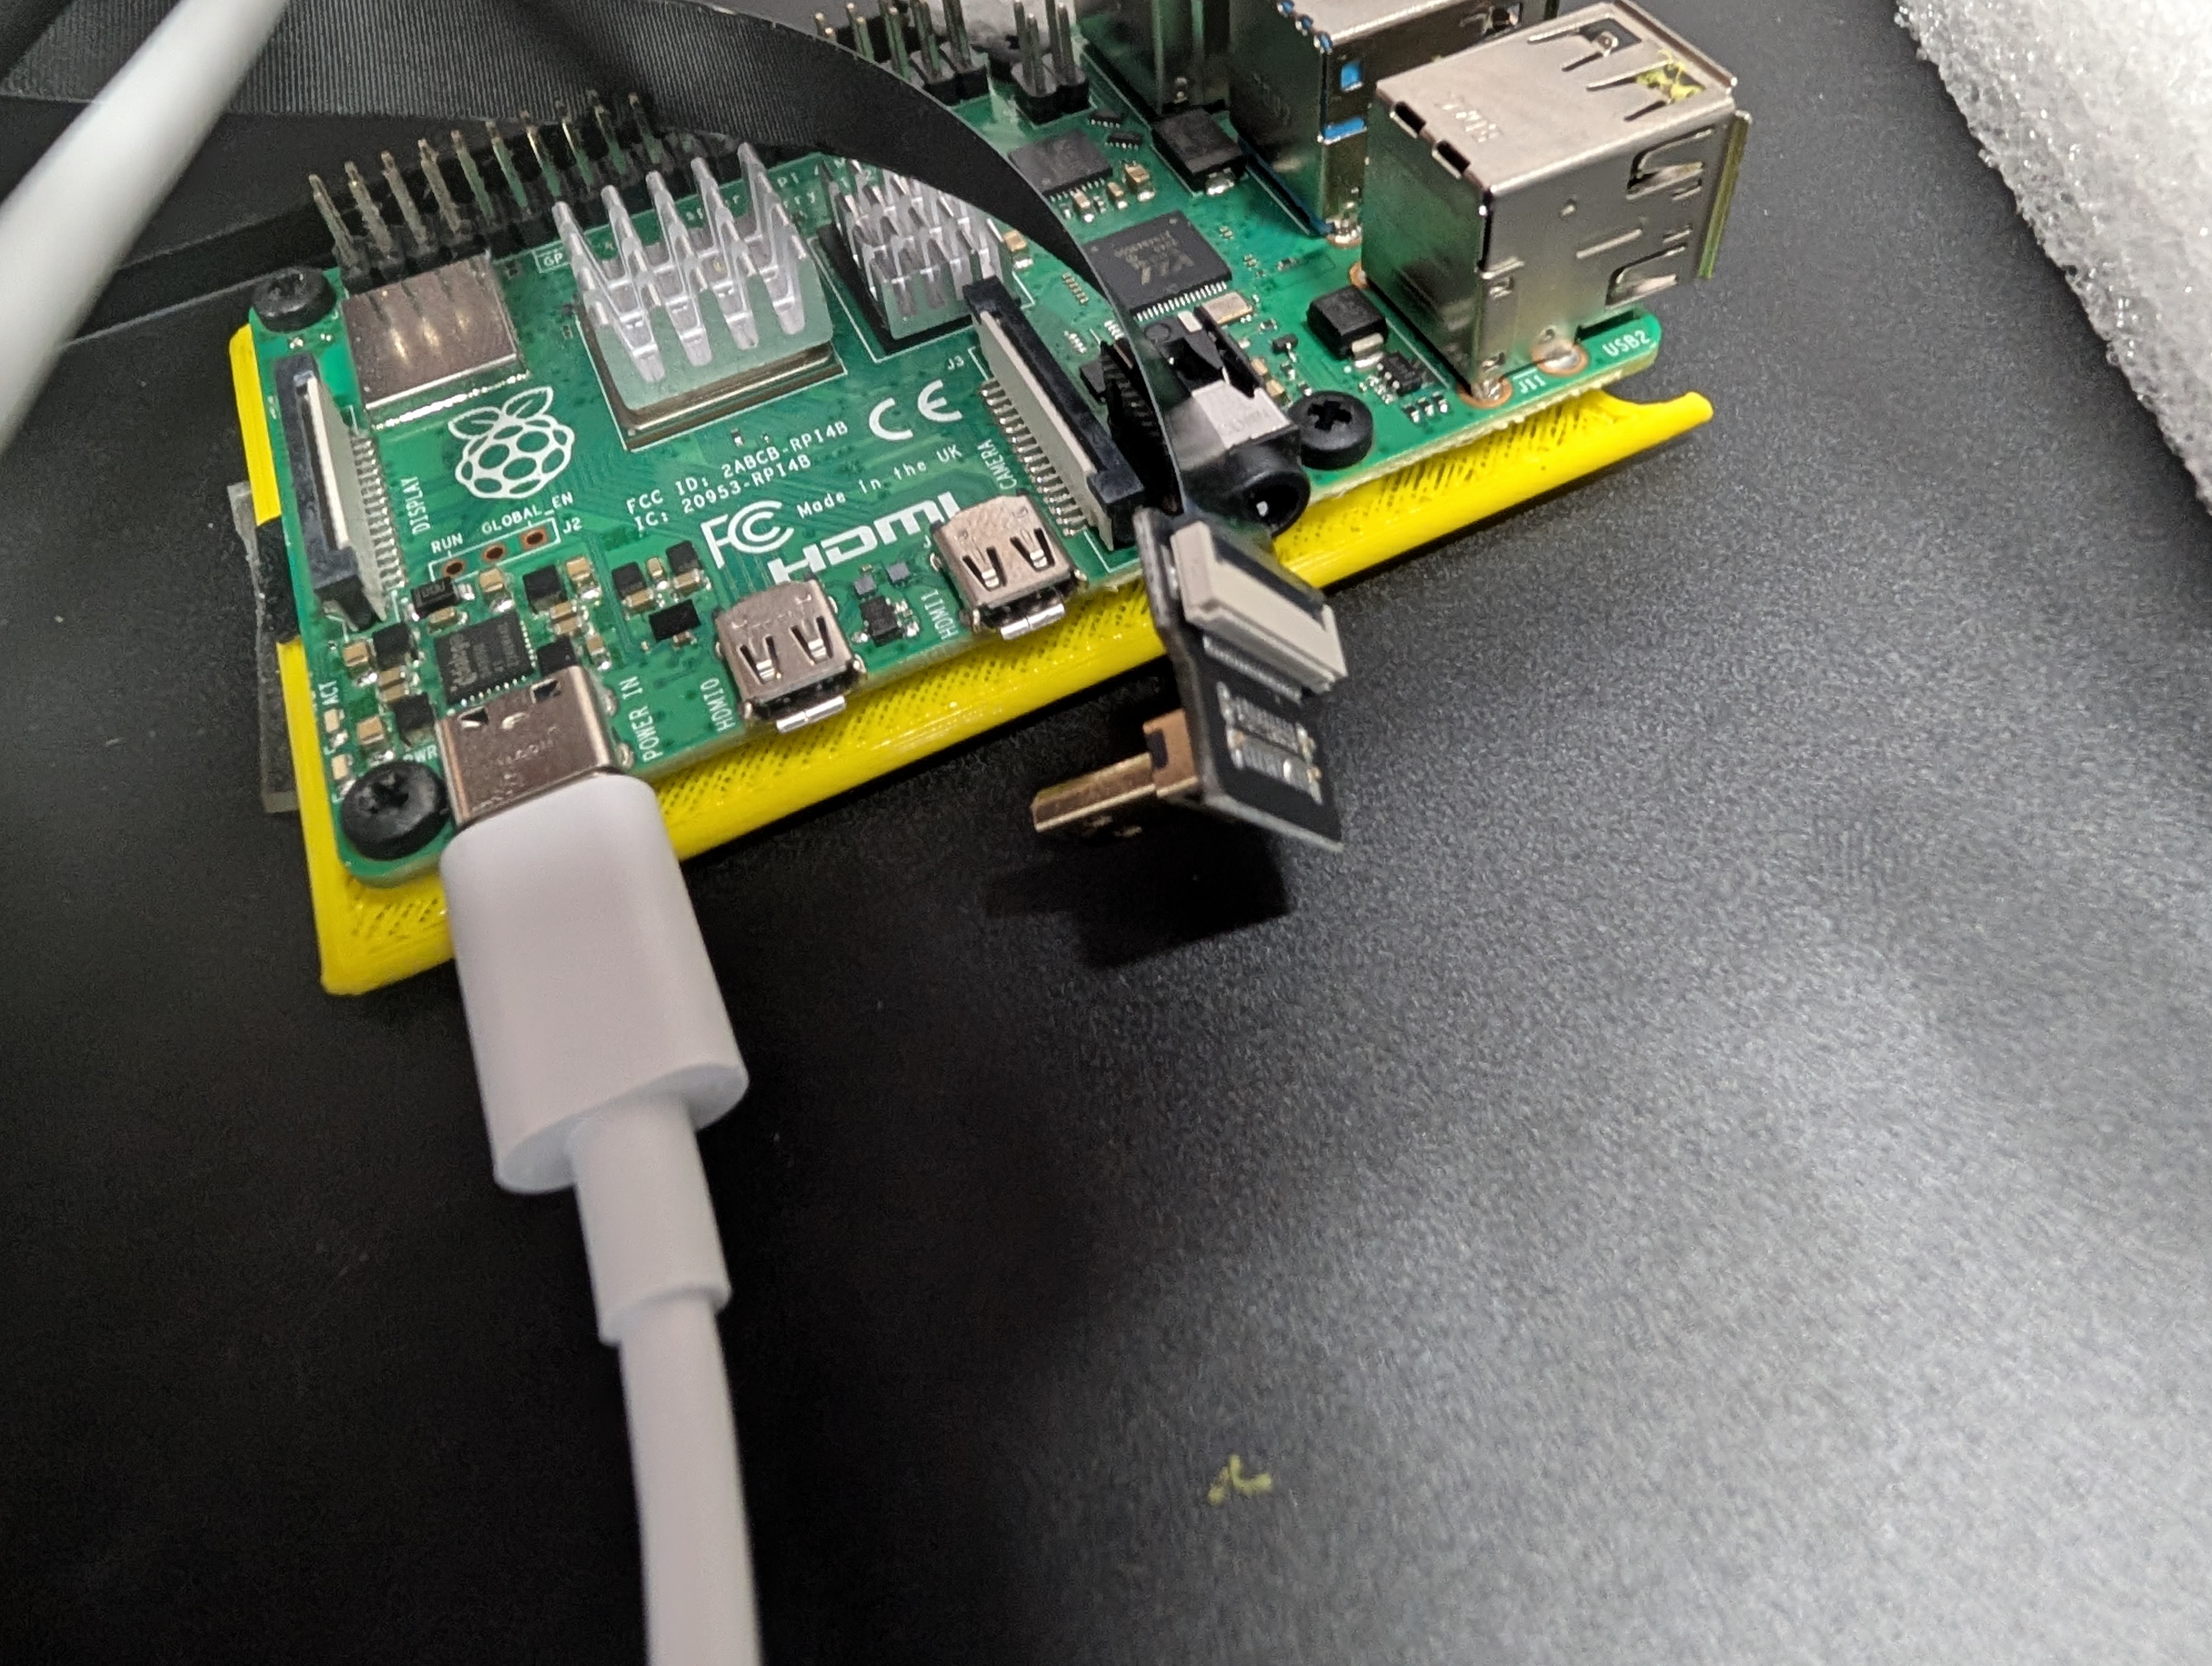
Did not realize the micro hdmi was in the opposite orientation as on the RPI4... whoops.

Mirror Border to fill the empty space and add support for the 2 way mirror.
I put these white packing material around the monitor to help center it in the frame.
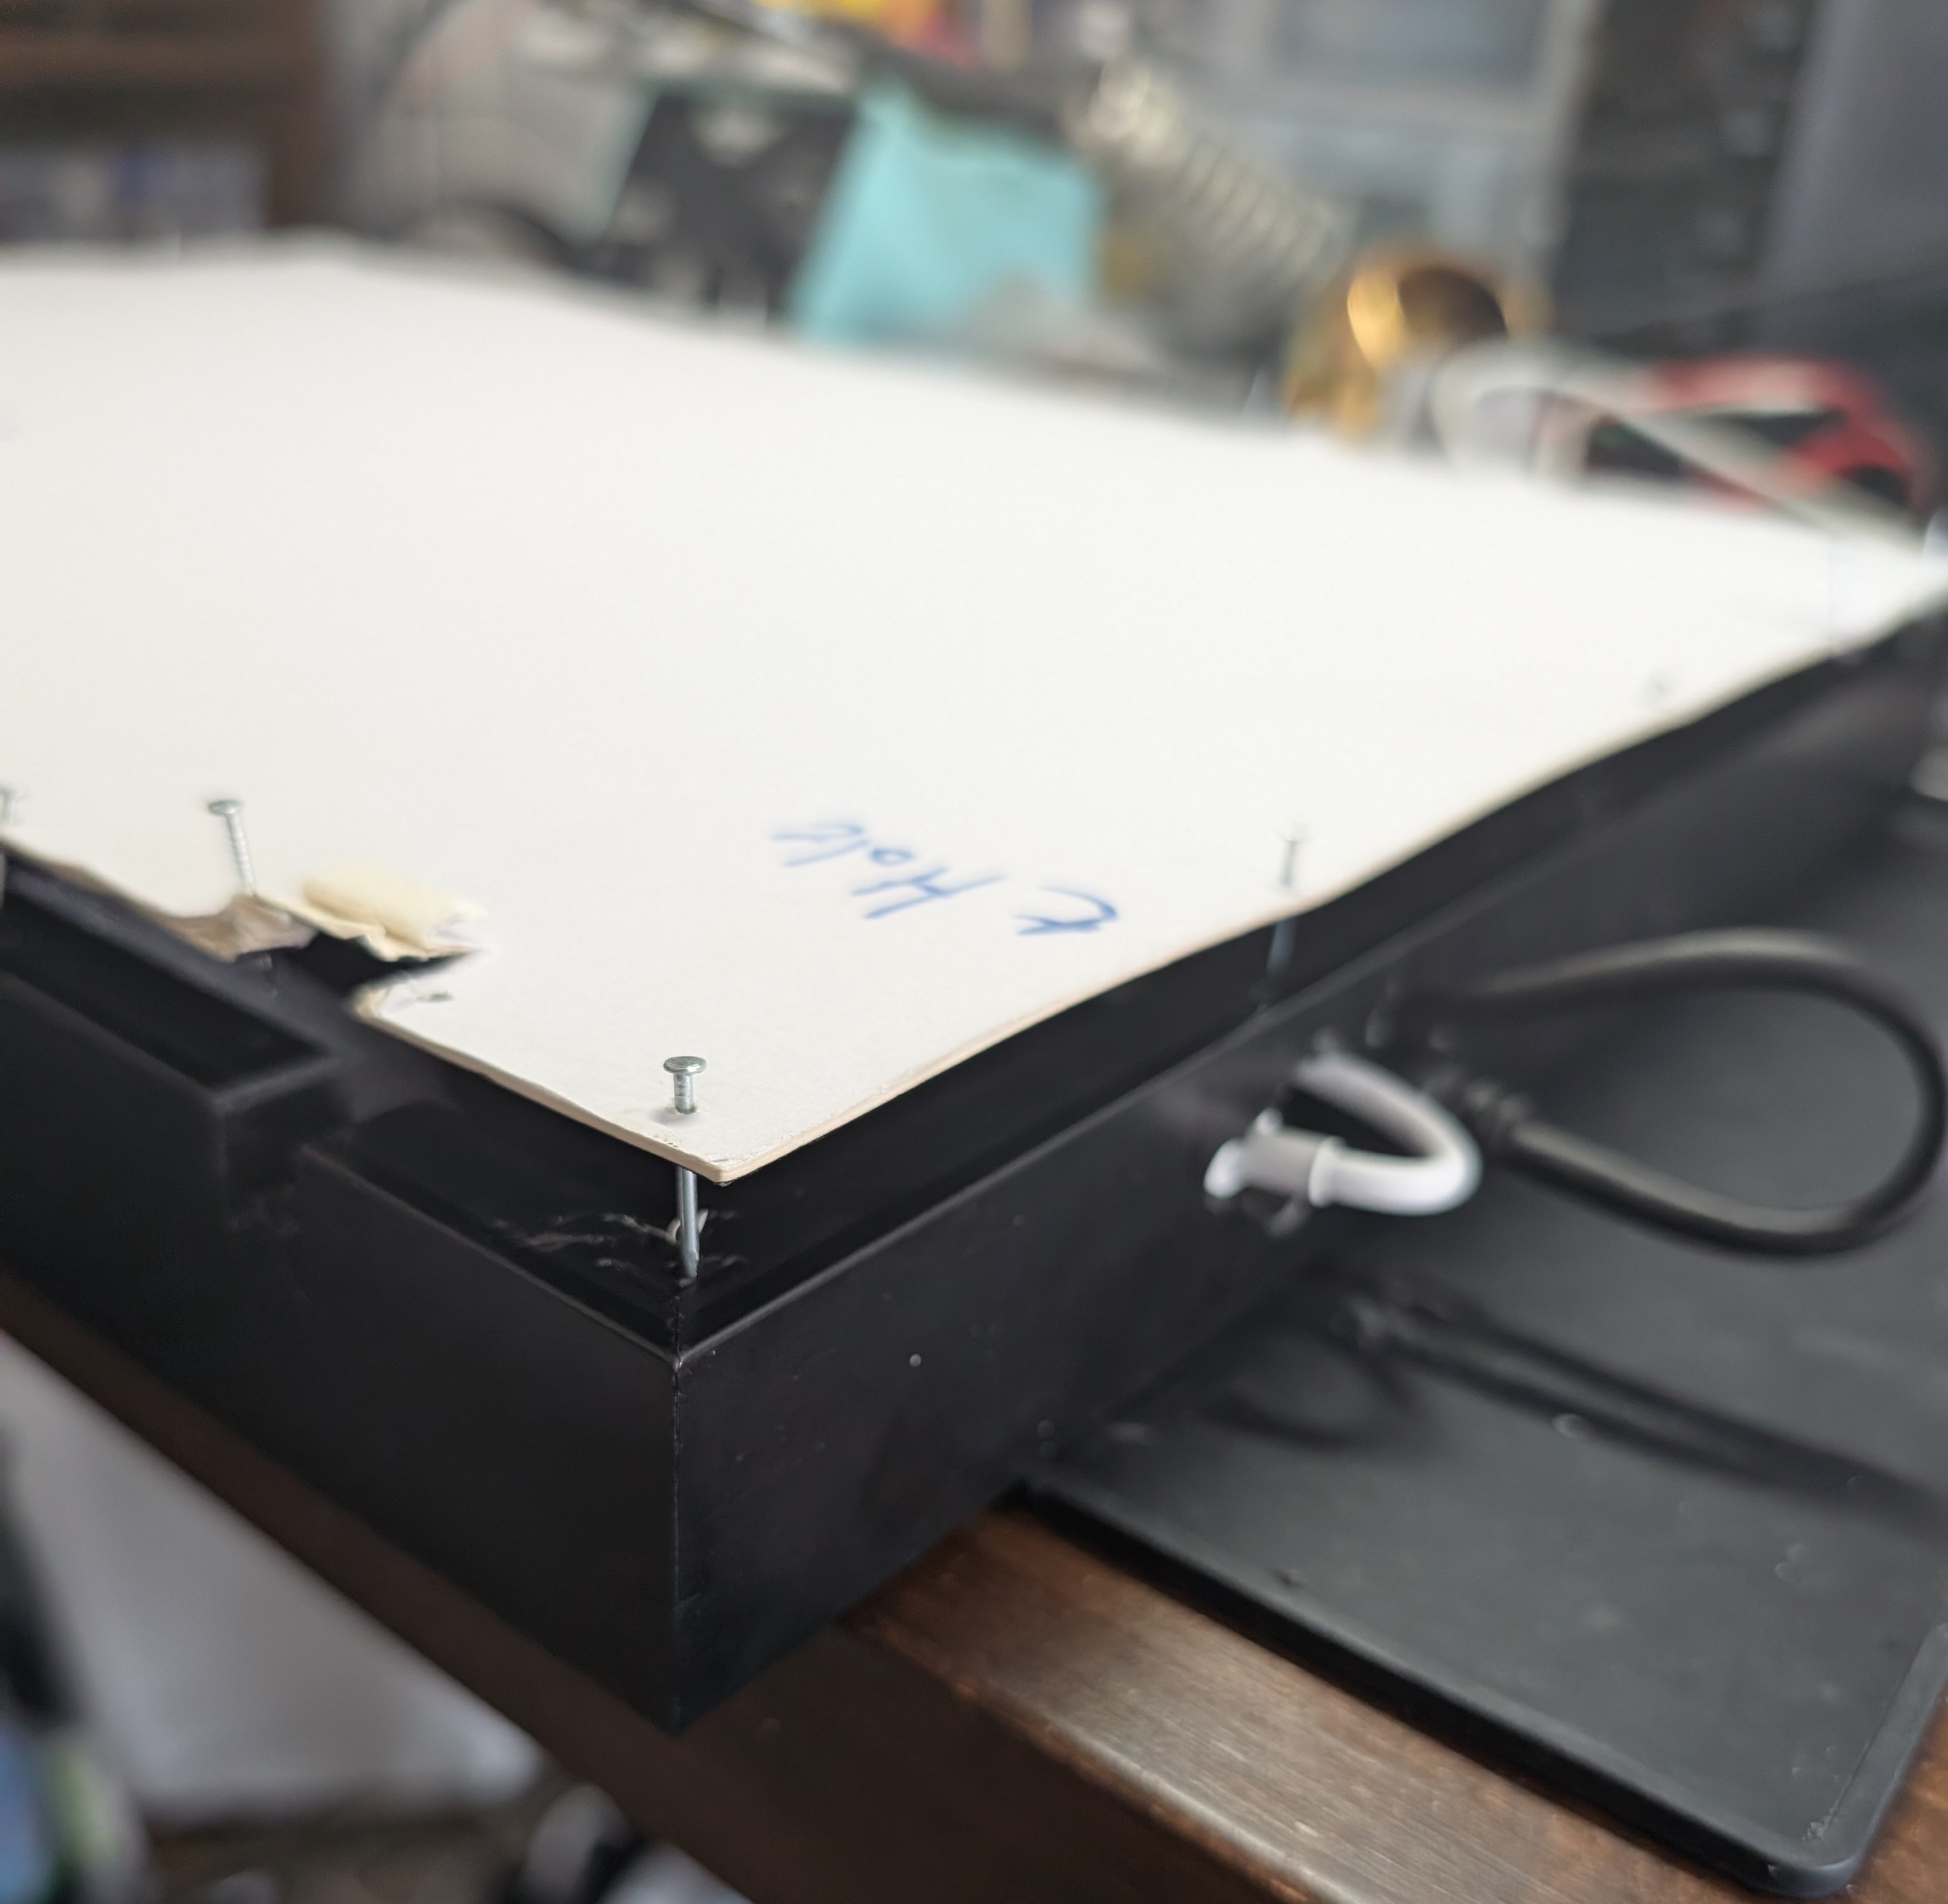
Sealing the whole thing up with nails. I wish I had a better way but oh well! It works ¯\_(ツ)_/¯
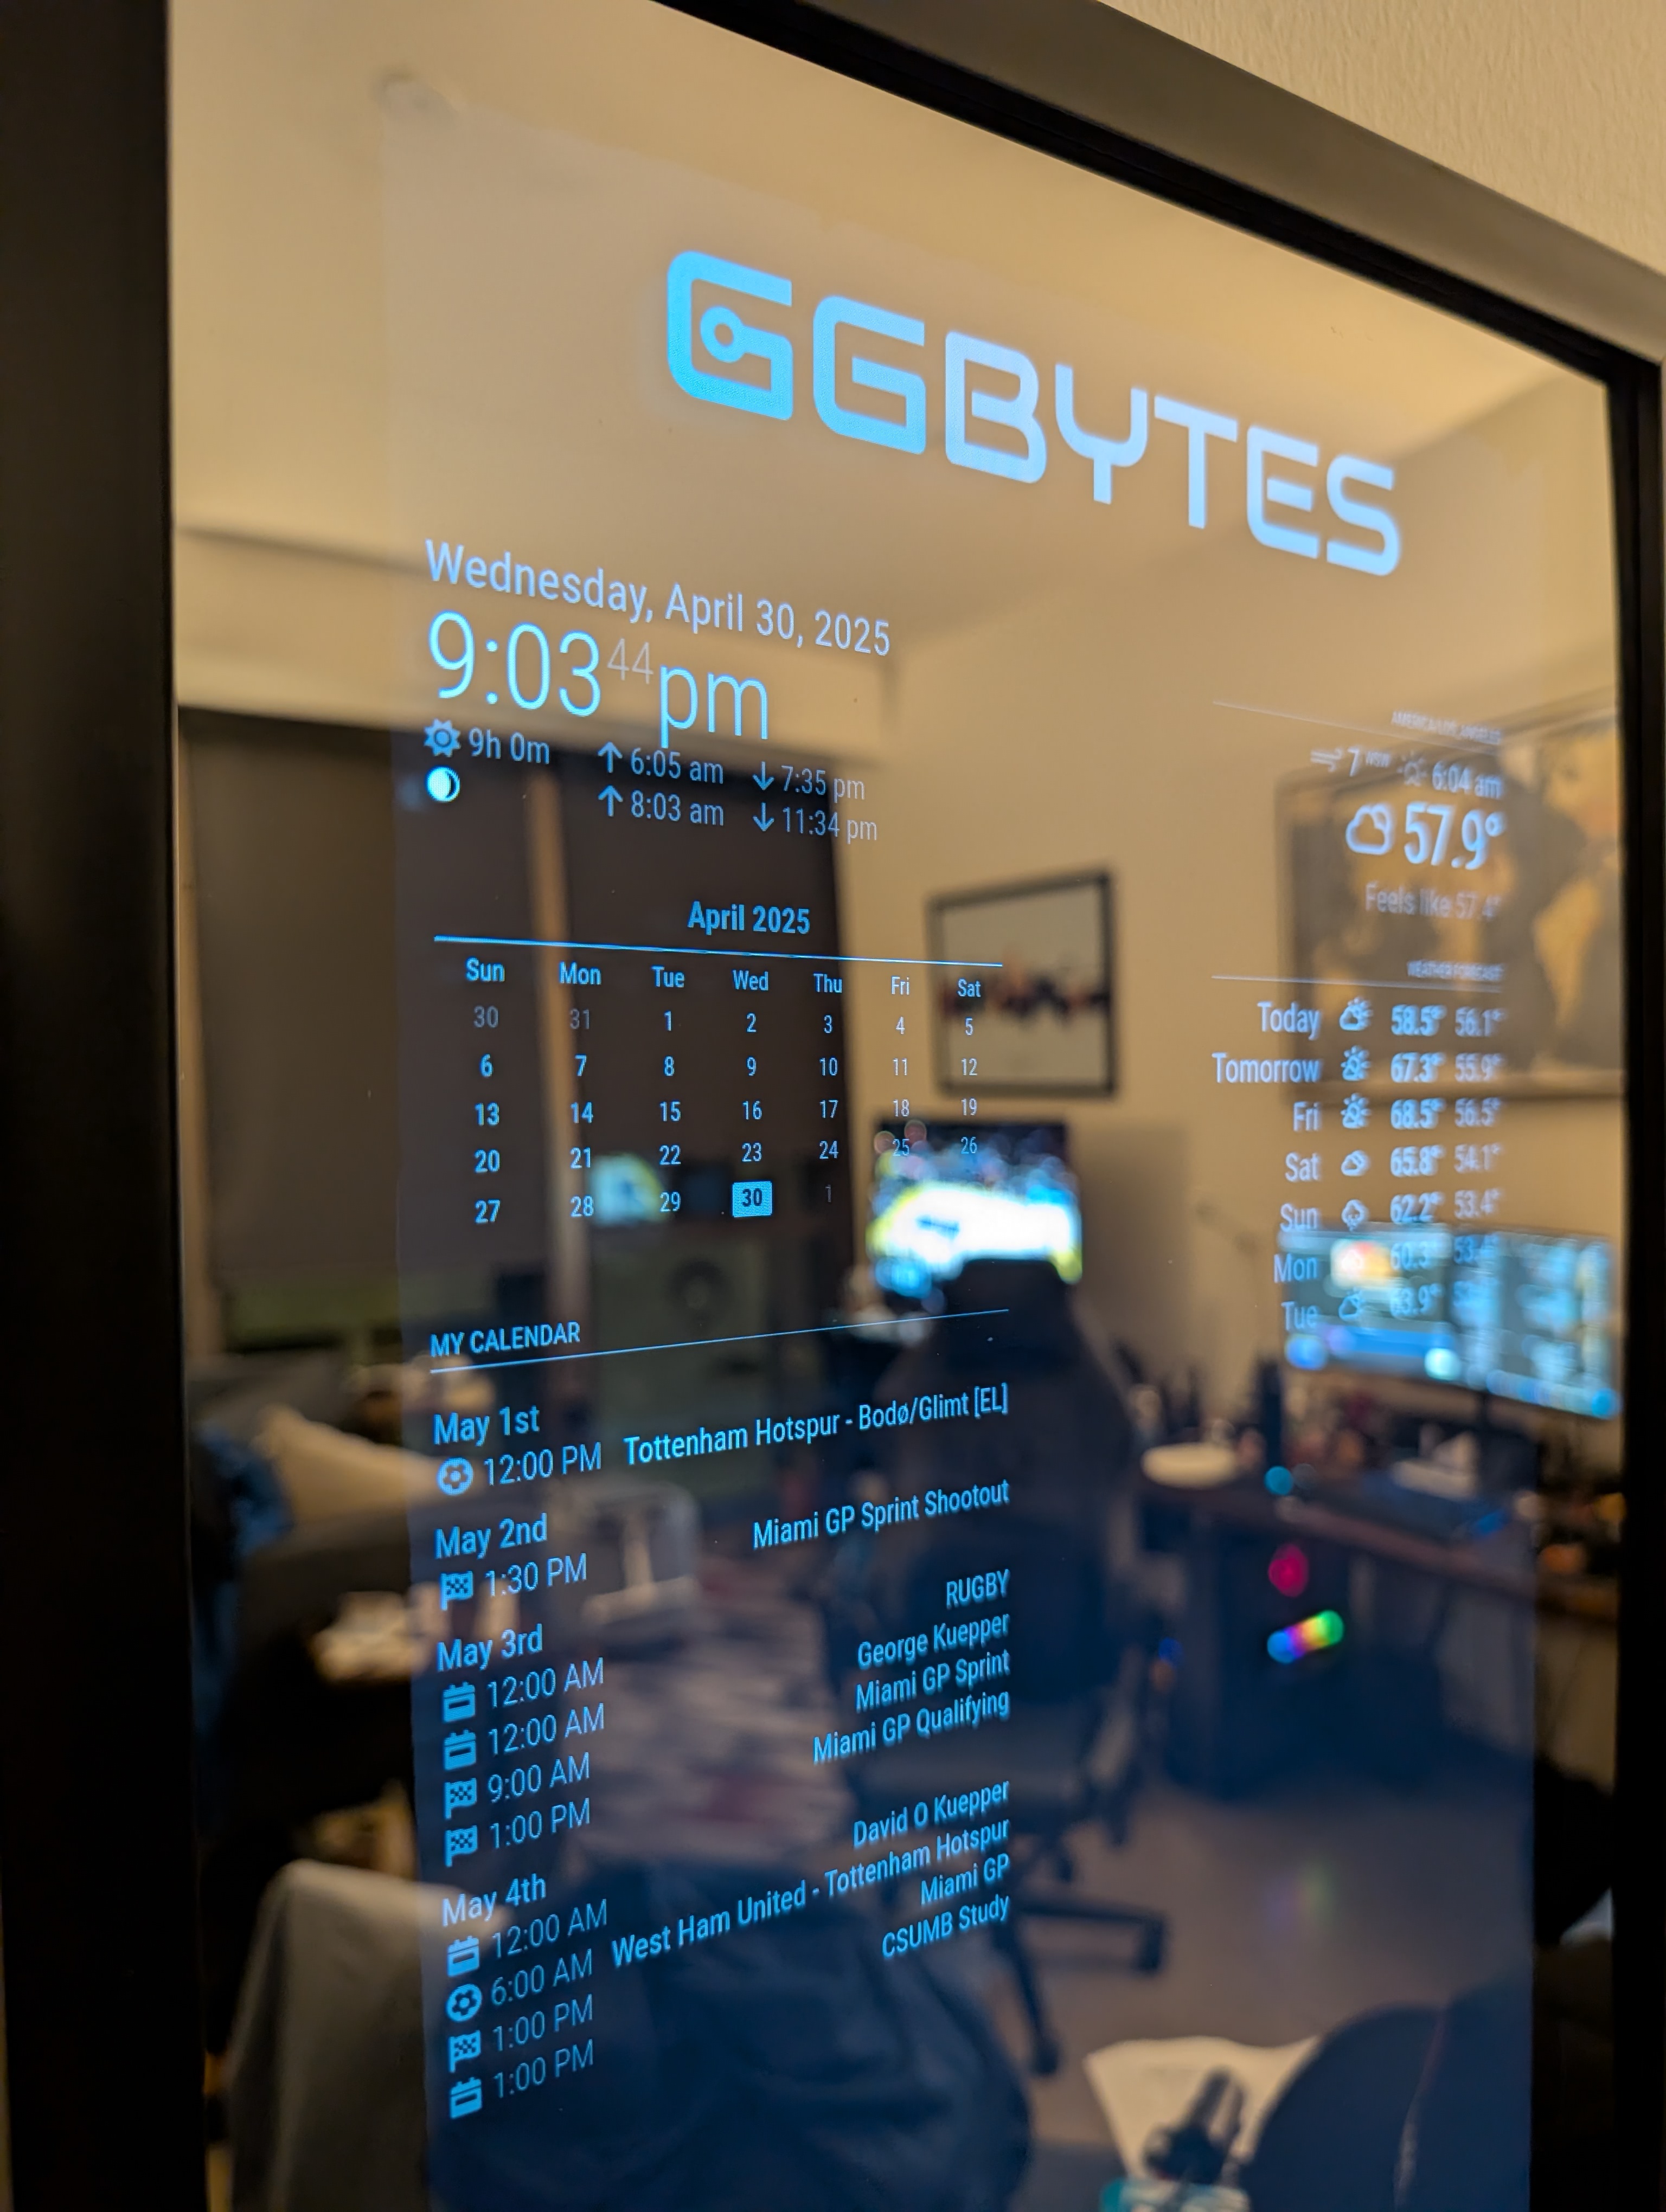
Still came out clean! :)
Key Takeaways
- This was a fun project that uses a Raspberry PI to create a functional smart mirror that I use daily.
- Using a modern Portable Monitor, I think is the way to go, since it’s already low-voltage and excellent viewing angle compared to older screens.
- Using actual glass would have been better, since the acrylic has a slight clown mirror effect, but that would have been much more expensive.
Back to Top
First Smart Mirror Build
July 17, 2025
I built my first smart mirror using a Raspberry Pi 3+ and an old monitor I have lying around a year ago. After the PI stopped working I opened it back up to figure out why it stopped working. In process of doing so I accidentally shorted the 110V circuit and the circuit breaker in my apartment tripped. So I basically fried the monitor and PI so opted to start over with a newer monitor.
The original build using an old 720p monitor, which fit perfectly in the frame!
I’ll be posting the new monitor build soon, but wanted to share my original build for funsies. I do miss how the old monitor fit perfectly in the frame I had, but the viewing angle was terrible.
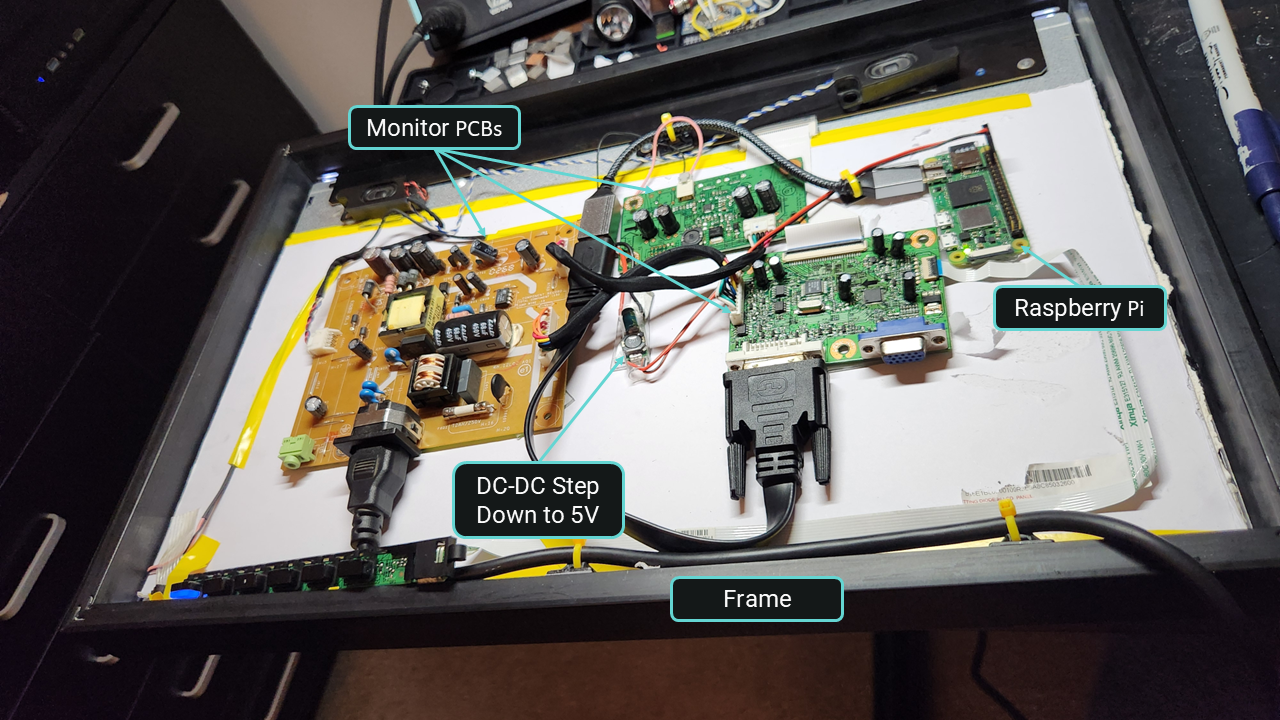
The 3 monitor PCBs are visible. I was able to find where the AC power gets convert to ~18VDC, where I soldered in the 5V DC-DC converter to power the pi. Also note a PI Zero is shown which DOES NOT WORK btw. From experience it's best to use a PI4 and above.
Components
MagicMirror² Modules
Core Modules
Third-Party Modules
Steps to Build
- Install MagicMirror²: Follow the installation guide to set up the software on your Raspberry Pi.
- Configure Modules: Customize the modules you want to display, such as weather, calendar, and news. You can find a list of available modules here.
- Set Up the Hardware: Assemble the two-way mirror with the monitor and frame. Ensure the monitor is positioned behind the mirror for optimal visibility.
- Connect the Raspberry Pi: Connect the Raspberry Pi to the monitor and power it on. Make sure it boots into the MagicMirror² interface.
- Final Adjustments: Adjust the settings in the
config.js file to customize the appearance and functionality of your smart mirror.
Key Takeaways
- This was a fun project that uses a Raspberry PI to create a functional smart mirror that I use daily.
- Using a modern Portable Monitor I think is the way to go, since it’s already low voltage and excellent viewing angle compared to older screens.
Want to thank the MagicMirror² community for their extensive documentation that made this project possible. If you’re interested in building your own smart mirror, I highly recommend checking out their resources and getting involved in the community.
I’ll be posting the new and improved build soon!!!
Back to Top
Jekyll
April 23, 2025
I’ll be moving to using Jekyll to display my static pages and organize my posts. I was thinking of Node.js with express but Jekyll will do all that I need.
Roadmap V3
- Display pages using Jekyll
- All posts displayed on the main page, and tagged with categories like `csumb`, `project name`, etc.
- Project-related posts will show on the main page and on the project itself.
Back to Top
Culinary Otter: A Recipe Web Application
April 18, 2025
Culinary Otter is a user-friendly web application designed for students and home cooks seeking culinary inspiration. It allows users to:
- Search for recipes using an external database.
- View recipe details, including ingredients and instructions.
- Create user accounts to save favorite recipes.
- Create customized recipes from recipe lists.
- Manage personalized lists of favorite recipes.
- Retrieve saved recipes for later use.
- Enjoy food images provided via an external API.
The project combines a robust backend, external APIs, and a polished front end to deliver a seamless culinary experience.
Back to Top
Project Template
April 09, 2025
I’ve been working on improving the structure and design of my website to make it more user-friendly and visually appealing.
Back to Top
Initial Setup
April 01, 2025
This is the initial setup for the Test Project. It includes basic configurations and layout testing.
Back to Top
Tweaking Styles
March 26, 2025
Hope y’all enjoy the website refresh! I’ve been messing with CSS styles and figuring out ways of styling this blog. I’m glad I was able to finish my little roadmap below. I think the next steps to improve the site will be:
Roadmap V2
- Create a project template page.
- Create a project roadmap template (HTML/Markdown format page of some sort).
- Decide if I really want to use
Node.js Jekyll to create a blog, or stick with hard coding.
- ...and whatever comes to mind.
Back to Top